Thumb Spica Taping
This taping technique will limit movement in the joint between the thumb and the hand to help the soft tissues heal after a thumb sprain. You use loops of tape around the thumb that attach to the wrist and ‘rein in’ the thumb to prevent it from moving.
Equipment Required
- 2.5cm Zinc Oxide Tape
- Scissors (optional)
Instructions
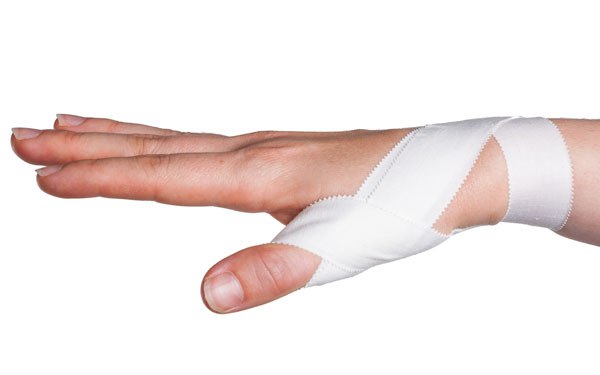
Step 1: Start by creating an ‘anchor’ on the wrist. Circle the wrist once with the zinc oxide tape as pictured:
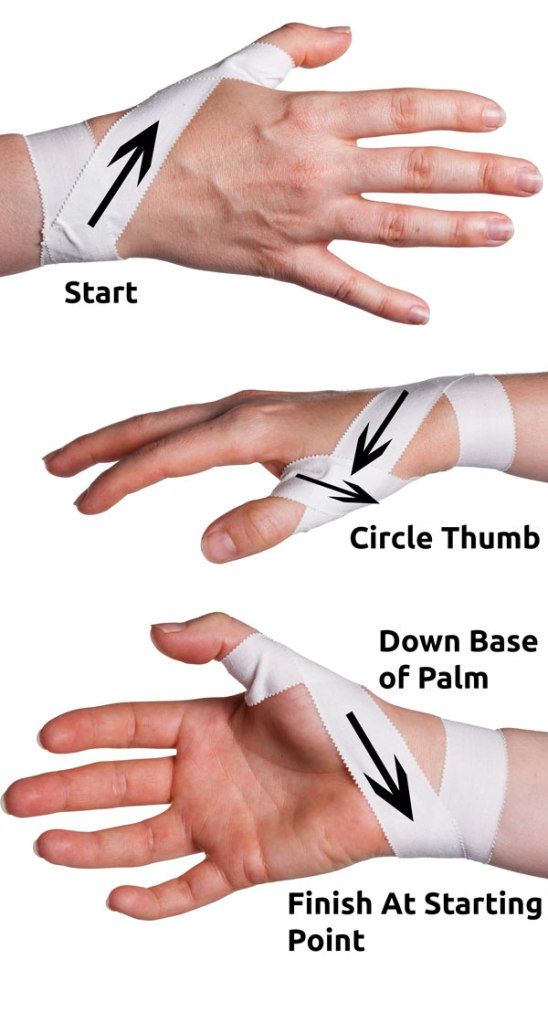
Step 2: Now you add the tape strips that will support the thumb itself. With the zinc oxide tape, start on the outside edge of the wrist – i.e. on the same side of the wrist as the little finger is. With a single continuous strip of tape, bring the tape diagonally up the back of the hand, onto the first joint of the thumb. The tape should cross the main knuckle of the thumb (the knuckle where it joins the hand.) Continue all the way around the thumb, so the tape crosses itself, then come down the base of the palm and around the outside of the wrist to finish the strip of tape where it started. The steps are pictured here:
Step 3: Add a second support strip of zinc oxide tape directly over the first strip from step 2:
Step 4: Finally add a second anchor directly over the first anchor from step 1, to lock off the loose ends of tape. That’s it.
Tip: This technique will be helpful for lighter thumb sprains and in situations where you can’t wear a brace but still need to give some support to the thumb. However, a more complete immobilization of the thumb using a splint or brace may be more effective than tape. Therefore, you may wish to consider purchasing a thumb spica brace.